If you are a business admin and you have to create a business group for a newly on-boarded department, and you want to entitle OOTB catalog items for the members of this group, how will you do it? Through the UI, you would
- Create a business group by:
- Open the Business Groups tab.
- Click on “new business group”.
- Fill in group information: name, description, default machine prefix, managers, managers emails, users, etc.
- Create Entitlement
- Open the Entitlements tab
- Click on “add entitlement”
- fill in entitlement information: name, description, expiration date, status, business group
- Assign the same users from the business group
- Assign catalog items to the entitlement
Those are a lot of clicks. Imagine if you could do it with a single click (or a lot less than the above example), with an automated solution that is less error prone and fast! Well you can do it with the help of ASD and vRO and here we will show you how to do it. We will create a vRO workflow and an ASD blueprint out of it that we will publish to the Catalog.
The good thing is that all of the above operations have their corresponding vRO workflows and scripting action delivered by the vCAC plugin and all of the workflow activities can nicely map to the manual steps.
We will build a wizard, which collects a list of users and catalog items, BG properties and creates all automatically. This wizard is actually quite easy to build, here’s how:
Lets create a workflow, we will name it “Create Business Group with Catalog Items”. The first thing to do on the empty workflow, would be to drag a new workflow and from the workflow chooser to choose the “Create a business group” workflow. When the workflow is added, we click on “Setup” to promote it’s inputs and outputs.
You can select what bindings to promote to inputs, but the most important we can note here are: name, description, defaultMachinePrefix, administratorEmail and users. Others are either skipped or a value will be assigned to them as an internal attribute. You can notice that the administrators input we have bound to an attribute. This is because for our solution we will allow only single administrator – the one requesting the end Catalog Item. This is why we will add an intermediate scripting action that from a workflow input administrator will return an array with this value as a single element.

Next if we follow the steps from the UI scenario, we have to create an entitlement. We drop another workflow element and select the “Create an entitlement”. We open the bindings editor again.
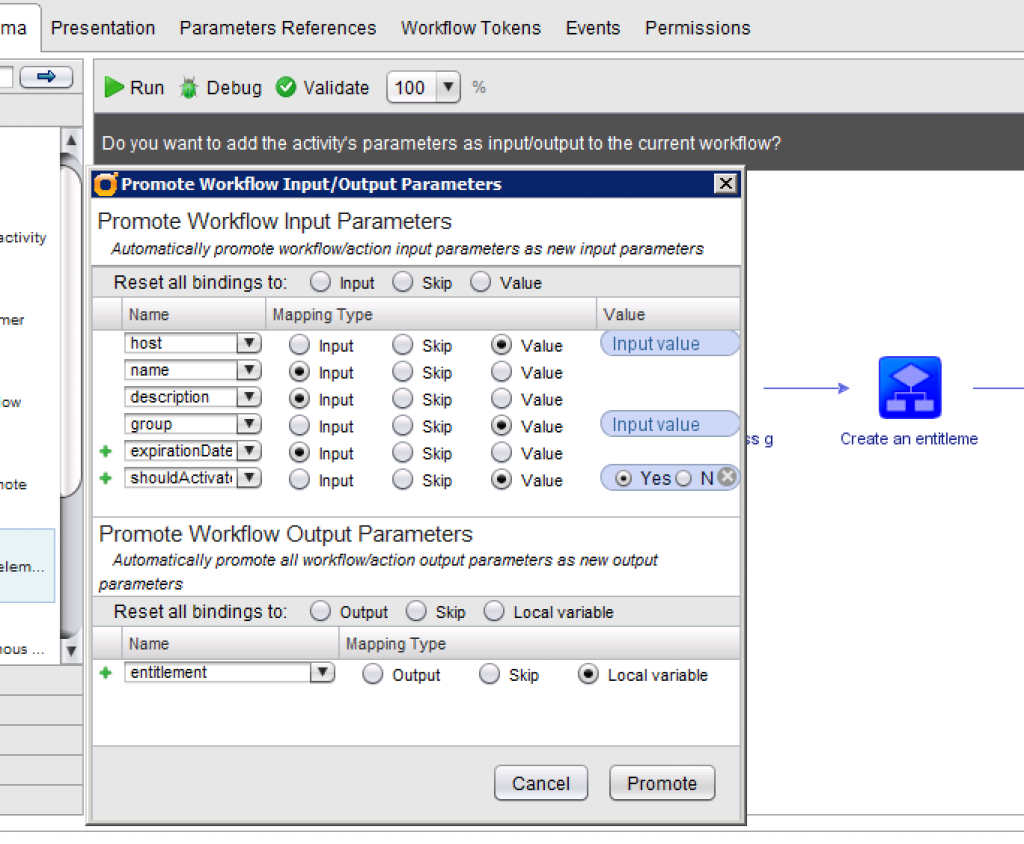
A lot of the inputs are automatically bound to the items that were created from the previous workflow. The input for the business group is bound to the result of the “Create a business group” workflow.
Now that we “have” an entitlement, we need to assign the users to the entitlement that we already assigned to the business group. For this, we will use the scripting action named “assignUsersAndGroupsToEntitlement”
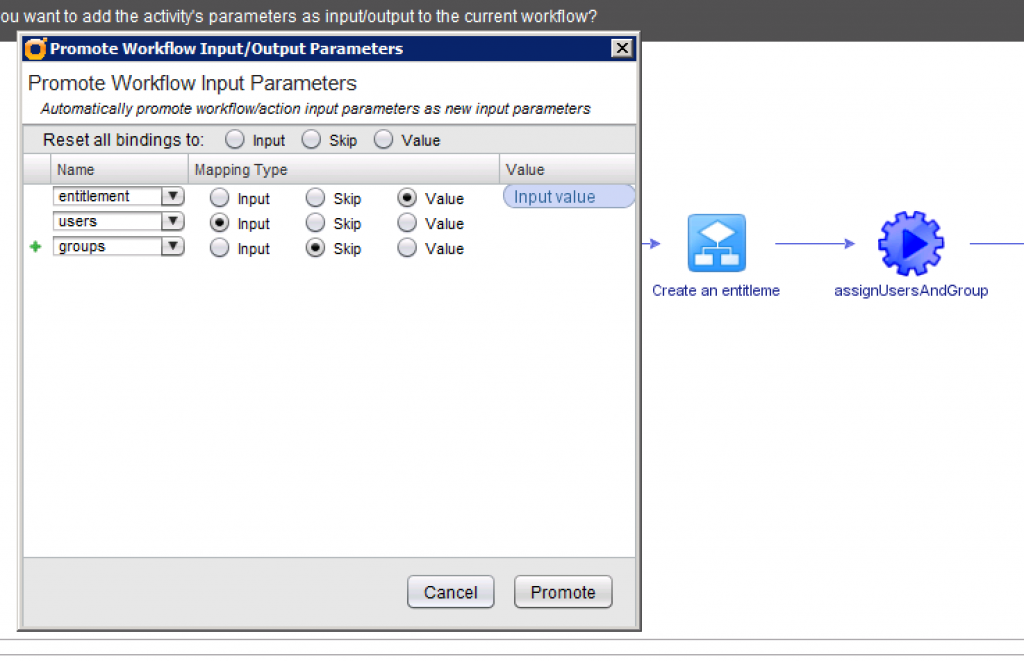
This action also accepts groups, but for our scenario we will skip them and bind only users and entitlement.
And as a last item we will include the “assignCatalogItemsToEntitlement” scripting action.

For the entitlement, we use the result from the previous workflow. We will expose the catalogItems as a workflow input so that the user can select which items to entitle. We will skip the approvalPolicy, but you can use it based on your requirements.
And these 4 workflow activities were all we need to automate the manual steps process. Now let’s see what we will do with the attributes and input of the workflows. The attributes panel shows:

The attributes administrators, group and entitlement will be populated in the execution of the workflow. The shouldActivate is marked as true, as we want the entitlement to be active. For the host we will select a VCACHost from vRO’s inventory. Make sure you have added hosts using one of the “Add a vCAC host” workflows.

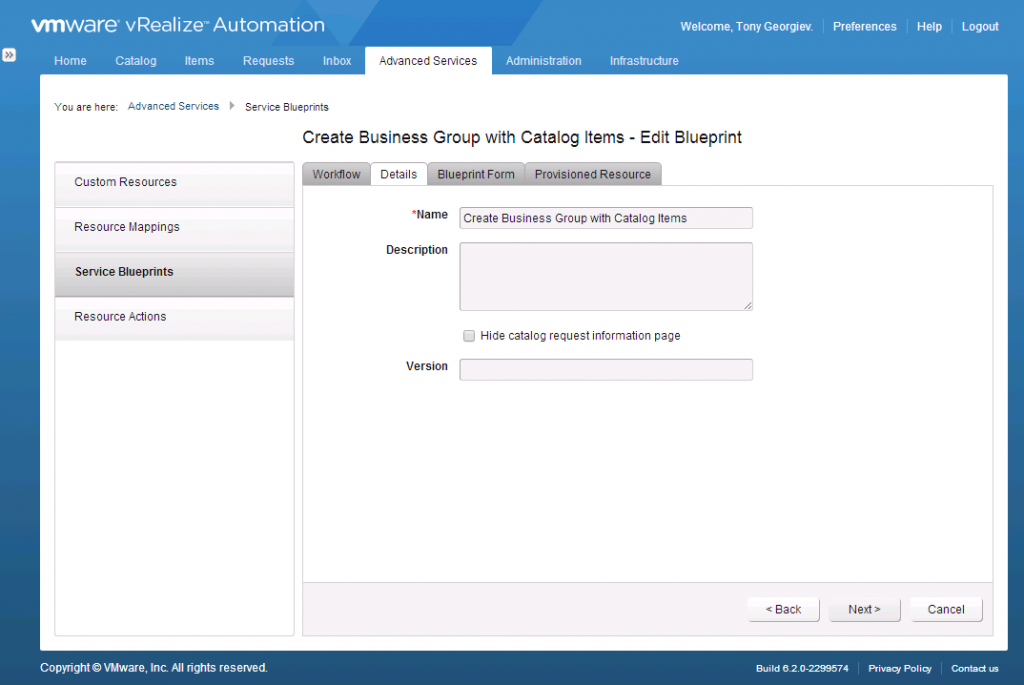
At this point we can go and create an ASD blueprint from this workflow that is fully functional. For this purpose we need to navigate to Advanced Services > Blueprints. Click on create a new blueprint and follow the wizard.
Pick the workflow

Give some details about the blueprint (Hint: you can check the “Hide catalog request information page” so that the Request information tab in the catalog request is removed)
Next you will see that we have one nice auto generated form, you can modify anyway you want, but the default configuration is enough to save and publish the blueprint.
This is the minimum requirements we need to create a single page wizard that combines the inputs of few different screens from the product and allow us to run a set of operations with a single click.
Advanced Configuration
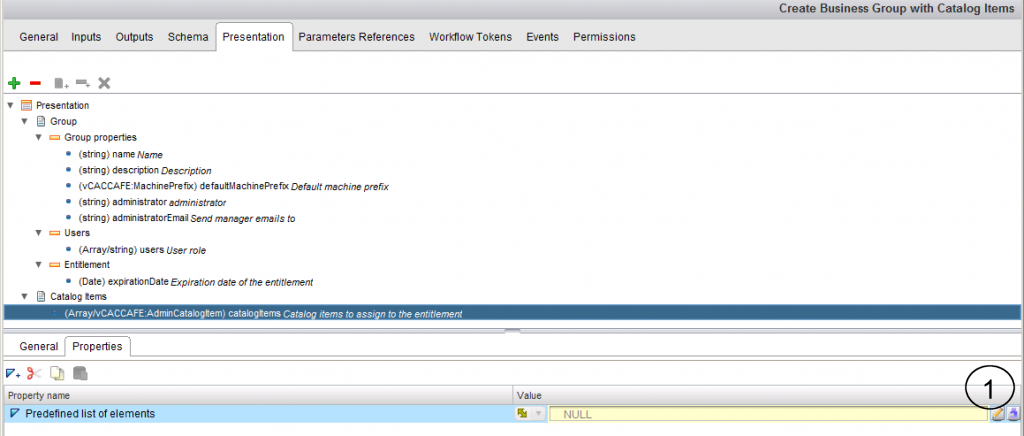
Now we will tweak it a bit, adding the cherry on the cake. We can take some time to style the presentation of the workflow. All inputs fields can be grouped in steps and groups, and have specific constraints. One important thing here to do is to define predefined list of elements for the catalogItems so that only shared catalog items for the current tenant are shown. For this purpose we will create a scripting action called “listAdminCatalogItems“. The action will take a vCACHost as input and return an Array/AdminCatalogItem. The code for the action
var dataQuery = new vCACCAFEOdataQuery();

// Order the result by catalog item's name
var order = new Array();
order[0] = "name";
dataQuery.addAscOrderBy(order);

// Add filter to list only tenant shared catalog items, not assigned to a particular subtenant
var filter = new vCACCAFEFilterParam("eq", "organization/subTenant", "null");
dataQuery.addFilter([filter]);

var adminCatalogItemService = host.createCatalogClient().getCatalogAdminCatalogItemService();

var dataRequest = new vCACCAFEPageOdataRequest(1 , 100 , dataQuery);
var pagedResources = adminCatalogItemService.getCatalogItems(dataRequest);
var collection = pagedResources.getContent();

var result = [];
for (var i = 0; i < collection.length; i++) {
var ci = collection[i];
// Return SDKObject with the correct type as there is an issue that the
// item will be implicitly converted to CatalogItem and we want AdminCatalogItemvar obj = new SDKObject("vCACCAFE:AdminCatalogItem", ci.vcoId.toString());

result.push(obj);
}

return result;
It basically calls vCAC’s Catalog API to retrieve the Catalog items that are not associated with a specific business group and orders them by name. It returns only the first 100 items, you may want to increase it. But have in mind that 100 items are a lot, so you may consider using an alternative approach to pick catalog items, like using a search component or tree.
Now we go back to the workflow and bind this action for the predefined list of elements of the catalogItems input

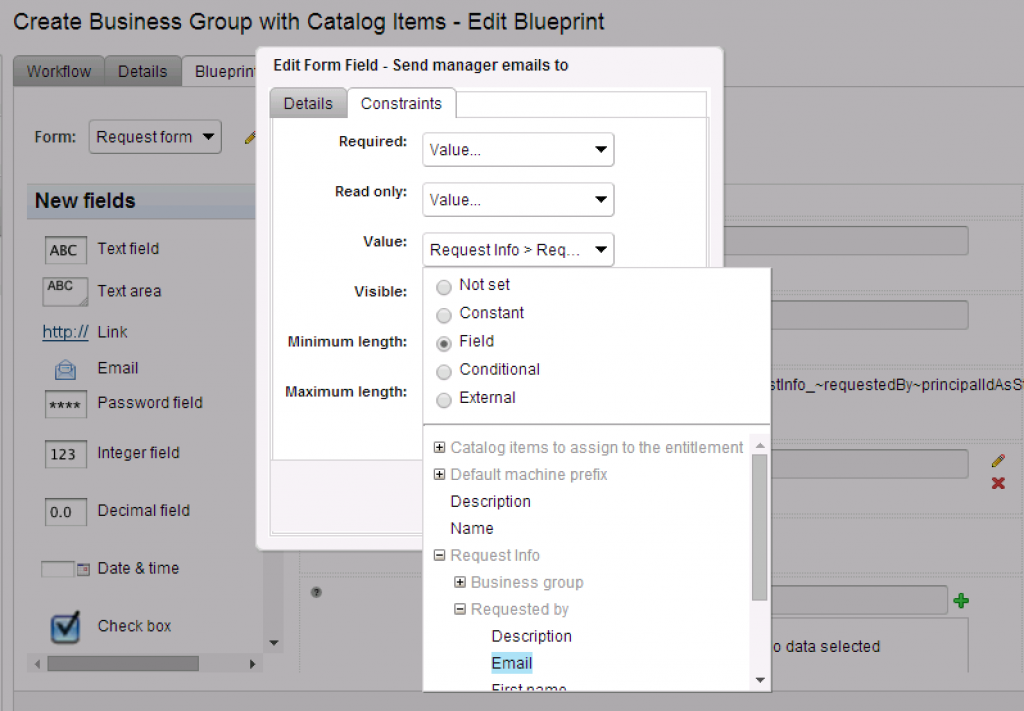
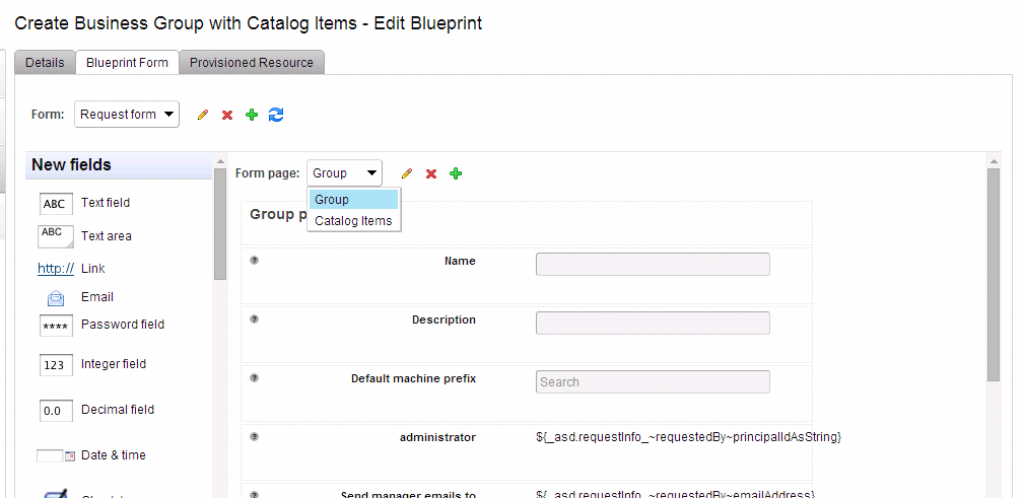
Next we can can tweak the ASD form by binding the request details. So instead of the user having to type every time his/her username and password, we can bind it to the one requesting the blueprint. We will do that by hovering over the administrator field and clicking on the edit button
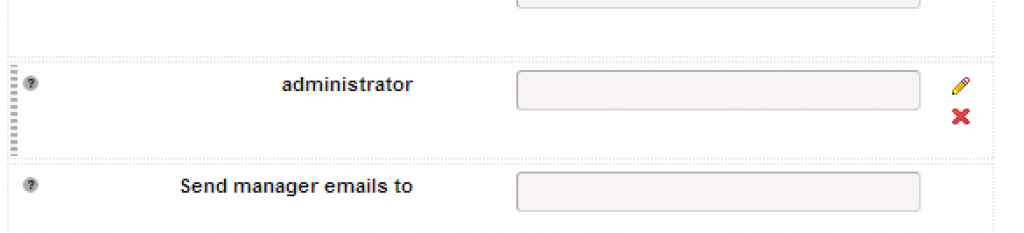
When the field editor opens up, we open up the constraints tab and define a fixed value constraint pointing to the request info properties and more specifically the requestor’s principalID

We do the same for the email field, but in this case we bind to the requestor’s email
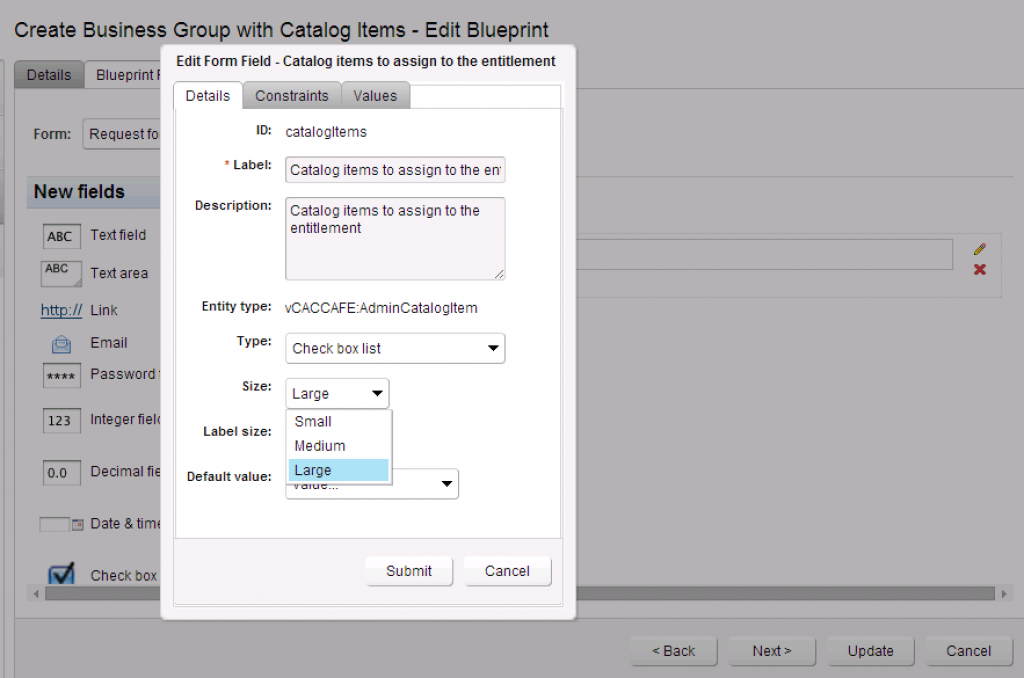
Next up we will change some visuals. We expect that the name of the catalog items to be long, so we can increase the size of the component displaying them, for better visual experience. We need to open the other form page holding the catalog item.
Open the details for this field
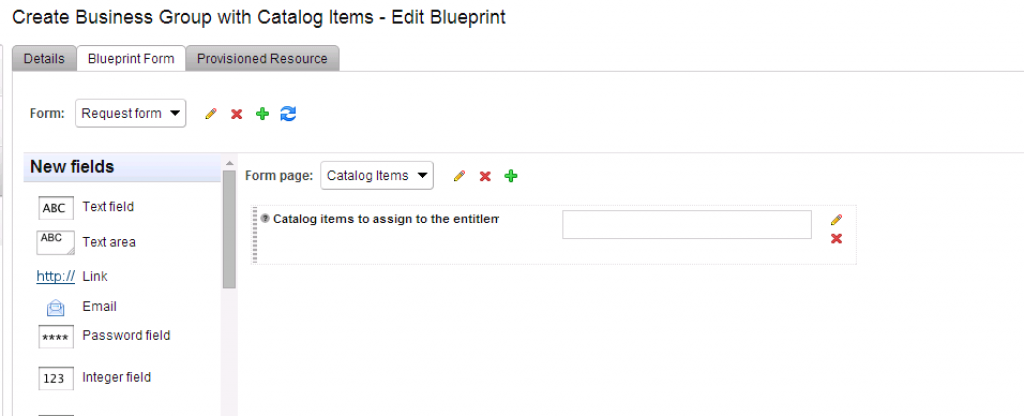
and increase the size to Large
And we are done with the advanced configuration.
Hint: One idea you can try to implement is to bind the selection of the catalog items list to a details section, so that you show the details about the currently selected items.
After assigning to the proper entitlement, we can start requesting the catalog item. You can see how the administrator and catalog fields have been already populated, making it easier for us to fill in the other details.
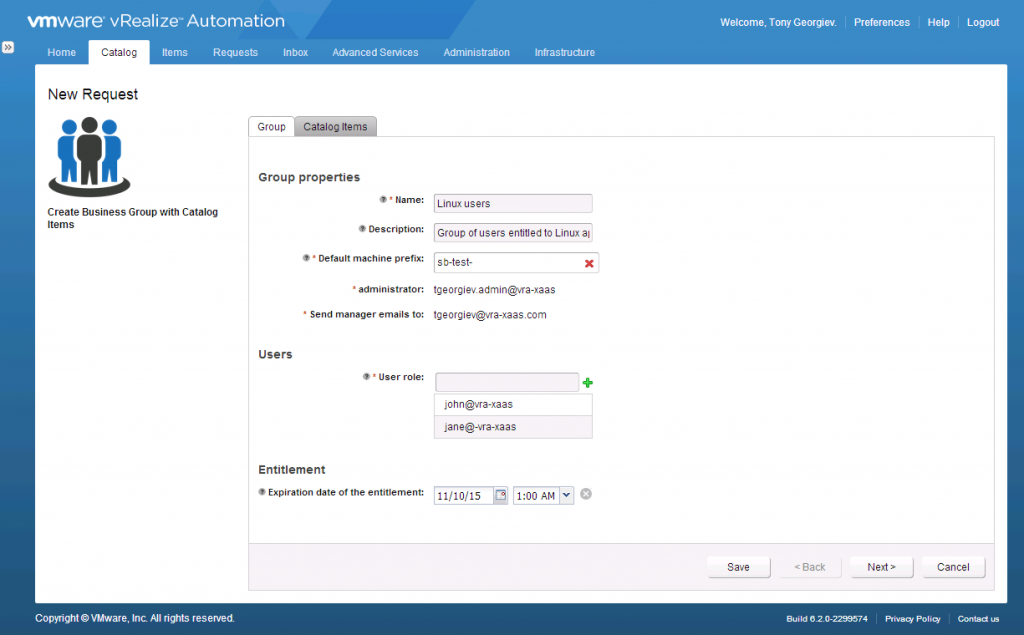

Once we are ready, we can submit the request and after completion open the Business groups, entitlements and user’s details tab to see that everything worked as expected.
Download the “Create business group” vRO package containing the workflow and scripting action
